|
| |
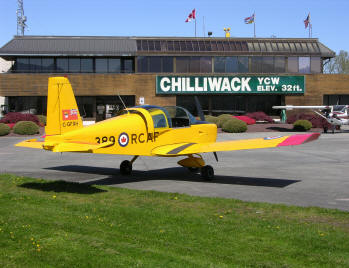
Restoration of the “Alley Cat”: Engine Overhaul
airframe restoration
|
After a fun filled year or so of flying the little Grumman with its’ new
paint job, it soon became obvious that the little beast was in need of a
major overhaul of the engine, a very expensive situation indeed. During
my discussions with other aircraft owners and my trusty expert Werner, I
decided to talk to Ken Vike, Vike Aeromotive,
Kamloops, BC. I wanted to up-rate the
engine to 118 hp and this required a Supplementary Type Certificate which
I purchased from Bill Scott, Precision Engine in Kentucky.
The STC was soon in my hands and a date was set to turn the engine over
to Ken Vike so that the work could begin to transform a very tired old
engine into “Something Special”…and none too soon. On 28 Dec 04 I flew
the Grumman and was not happy with the way it was performing so it was
grounded and we started the messy job of stripping the thing from the
airframe.
|
 |
|
|
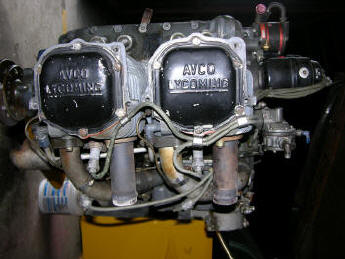
Once the engine was
free of the mount we decide to strip off a few parts for local
restoration, but most of it went to Ken’s shop. As you can see the engine
looks like it could be used as an anchor. Ken talked to me about a few
things that he would like to do with the engine to make it a show
piece…and of course I was really wondering what he might have in mind.
You’ll see soon enough.
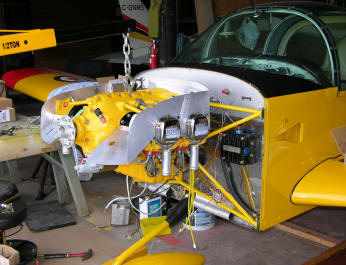
With the engine out
of the way, we started cutting new cooling baffles using the original
badly damaged pieces as patterns. In addition we had to modify the front
baffles to conform to the later model AA1B type for better cooling. This
required many hours of careful cutting, trimming and filing to make every
piece perfect…Werner was his usual self…the perfectionist… and I couldn’t
get away with any sloppy work. Instead of using metal screws to hold
everything together, we riveted in Plate Nuts and used stainless steel
screws to fasten the parts together. |
|
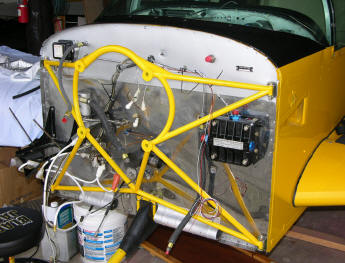
The baffles finished, it was time to completely re-do the firewall and
anything attached to it. The engine mount was removed, sand blasted,
inspected and send out for Non-Destructive testing. It was then primed
and painted to match the airframe. The firewall itself was cleaned and
polished and the upper section which is aluminum, was cleaned, etched and
painted to prevent corrosion. We made up new fuel lines, electrical
cables and a few other fittings as well as purchased new mounting bolts,
Lord Mounts and a host of other items.
I had never liked the
fuel gauges in the AA1A…nothing more than glass tubes with a little red
bean that floats on a column of gasoline…and I had been looking at a fuel
flow system that would accurately provide instant fuel information. I had
settled on the J P Instruments FS-450 Fuel Scan which provides fuel burn
at any power setting, fuel used, fuel remaining and time to empty tanks.
It also has pilot programming of alarms for fuel and time remaining as
well as pre-wired GPS data capability.
|
 |
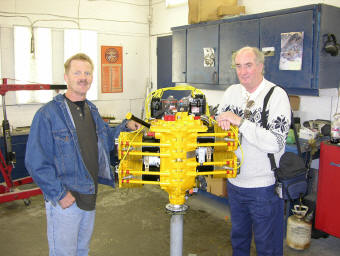 |
We got a call from Ken
about the middle of March letting me know that the engine was ready for
pick-up. So off we went over the mountain highway to his shop outside of
Kamloops and as you can see, he really “tricked” the engine out! That’s
me on the right with Ken. Virtually everything on the engine and
inside…except for the case and crank… is new. And it really performs. |
|
We picked it up mid-week but decided to start on the reinstallation on
the following Monday. Everything went quite well except for the bitterly
nasty weather…and we were working in a tee hangar without heat or lights
which meant that the doors had to be open!
Soon the engine was
in place and the final fitting of the baffles proved that Werner’s
attention to detail again paid off as very few adjustments were required.
Bill Scott had provided patterns for the additional baffling, these were
incorporated and the Old Barnstormer took the baffles back to the shop for
painting…No bare metal here like those spam cans from the mid-west. And
now the headaches began to appear!
|
 |
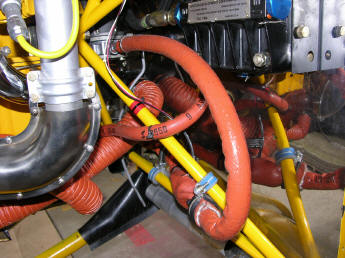 |
The Fuel Scan
transducer had to be installed in flexible fuel lines whereas the original
line was stainless steel. After much head scratching the new lines were
made up and installed… but not before a few expletives about the lineage
of the designer of this aircraft!
As seen here, there is not much room behind the engine to work on
anything…and the red fire sleeve is what finally ended up carrying the
transducer. Later, after a test run, the sleeve was sealed with high
temperature silicone. The stainless carburetor air heater on the left was
polished to go along with the chromed induction pipes and rocker box
covers. |
|
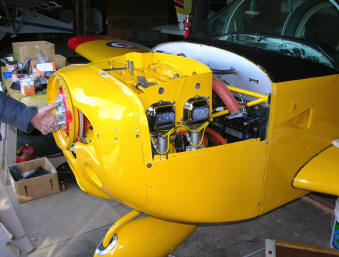
With the new baffles painted and installed, we then did a test fit of the
cowling and the spinner back plate because any time you make a change
there is bound to be a problem. In this case our hard work paid off and
we were able to complete the baffle seals and get ready for the initial
run-up.
But then the Gremlins
struck big time. We spent the best part of 4 days tracing down electrical
problems. Dead battery cells, broken crimp fittings and bad grounding
points were enough to make an old guy cuss a purple streak. We must have
checked and re-checked the electrical system 4 or 5 times before
everything came together and we were ready for final inspection. |
 |
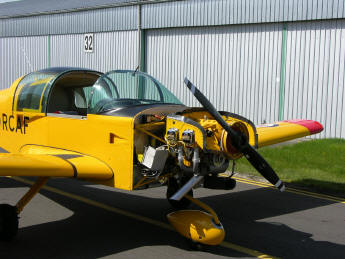 |
Outside in the
sunlight for the first time in nearly four months, the new Lamar starter
spun the engine over faster than at any time with the old heavy Prestolite
starter. All of the engine instruments indicated that we were on the
right track and the little Alley Cat was ready for final inspection.
|
|
Doug Scott came over
from Pitt Meadows and took a very good look at the work done on this
installation and he could not find a single snag! The paper work was
signed off and the aircraft cowlings were installed in preparation for the
first flight.
The engine started
smoothly and after getting approval to orbit overhead the airport at 1500
feet, I received taxi clearance and then completed the most thorough
run-up imaginable. A back track was approved to make use of every bit of
runway and I was cleared for take-off. Advancing the throttle, I noticed
that the acceleration was very smooth and rapid and I was airbourne in
under 700 feet. Accelerating to 100 mph, I raised the nose to maintain
that speed and noticed a solid 1000 feet per minute rate of climb…300
better than a stock aircraft. Leveling at 1500 feet I carried out a few
checks and after a short 15 minute flight, landed for a check of the fuel
and oil lines. With no apparent leaks, I took off on a 45 minute flight
over to the practice area then over to Boundary
Bay for a few circuits, followed
by a touch and go at Pitt Meadows before returning to Langley.
During normal cruise
at 1500 feet, the airspeed indicator was showing a solid 140 mph but due
to the turbulence I could not get an accurate speed check but it certainly
was higher than I had experienced before the overhaul.
If anyone else is
thinking about getting an aircraft engine overhauled, I would highly
recommend contacting Ken Vike at
kvike@shaw.ca for a quote and I know that you will not be
disappointed. His service and support is terrific!
I would also
recommend Bill Scott at Precision Engine, LLC at
precisionengine@mindspring.com . He also does full overhauls and is a
very knowledgeable Grumman owner and parts supplier. |
|
The JP Instruments FS-450 still has to be calibrated after I do a couple
of refuelings but that won’t be a problem.
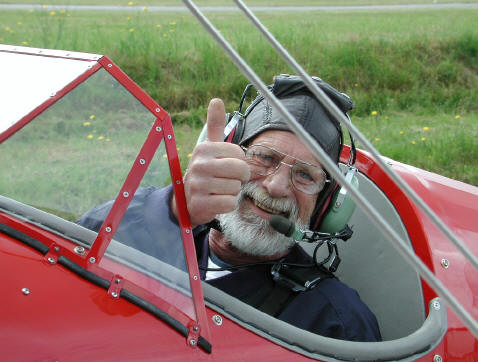
And finally, I want
to thank Werner (Barnstormer) Griesbeck of Langley, BC for all of his hard
work and expertise that has made all of this possible…shown here in the
MA-5 Charger which he and Dan Holliday built. This is another of his
prize winning projects.
|
 |
|
airframe restoration |
|
|
|