|
In the winter of 1975, while at Air Force Staff School in
Toronto, I visited a fellow in Whidby, Ont, who had a couple of Yales for
sale. These aircraft were pretty well complete but disassembled and were
going for very little money…$2500.00 delivered to Moose Jaw where I was
based. I did not buy the Yale and as often happens, kicked myself for not
doing so. 20-20 hindsight. Many of us have the same problem. So when Mike
Belcher asked if he could use my Avenger AS3 photo on his conversion set, I
jumped at the offer of another kit…only this time I got my Yale. |
 |
The kit
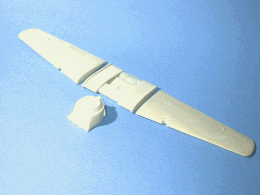
consisted of the Ocidental Harvard kit plus Mike’s resin conversion kit.
This later was of a heavy weight cream coloured resin, nose section
(cowling, engine with it’s unique exhaust system, forward fuselage), and
three piece wing and undercarriage . The wings required a slight clean-up
and as there are no alignment tabs, careful jigging of the three components
was required. I used 5 minute epoxy to glue up the wing sections and when
this had cured, I added the main gear (less wheels) and set this aside while
I made progress with the rest of the fuselage and cowling. |
| The plastic
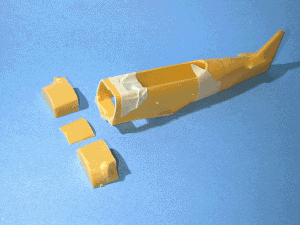
injected Ocidental kit is basically a Monogram T-6 knock-off in soft styrene
plastic and after assembly of the interior and taping the fuselage halves
for a fit check, I removed the nose section as per Mike’s instruction sheet.
The interior was placed inside the fuselage and this was then glued up.
While I was in the mood, the rudder and elevators were separated for a bit
more natural look, and the nose section was tackled. |
 |
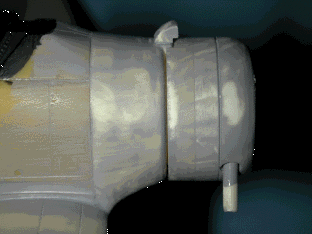 |
The forward
fuselage section fit perfectly so there was little to do here. The engine
was painted and detailed and inserted into the two piece cowling which in
turn was epoxied to the nose section. The exhaust and carburetor air intake
were added and the whole thing given a coat of Mr. Surfacer 500. This was
then sanded lightly with 600 wet and dry. |
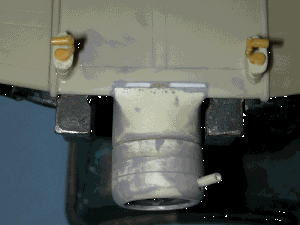
| The wing
was now attached and the gap between the wing and nose section filled with
scrap styrene. Again 5 minute epoxy was used to assemble this section.
There was a bit of filing to be done to get the wing to fit the fuselage
properly but this was a small item that showed up while dry fitting the
parts. A small amount of Tamiya putty was used on the wing/fuselage joint
but again this was no different from that needed in building some of the
high end kits. |
 |
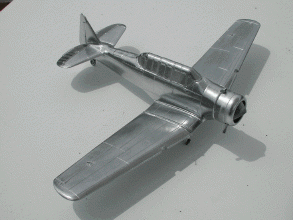 |
The tail assembly and canopy were then glued in place, the canopy masked
using the pre-cut vinyl masks included in the kit and the whole thing given
a couple of coats of gloss black Model Master enamel. Then Smedley, that
dastardly trouble maker, got out the SnJ aluminum powder and proceeded to
buff the blazes out of my Yale. And the results were pretty good. But it
should be Yellow…"not so sez Smedley", Try this you camo-phreeks.
|
|
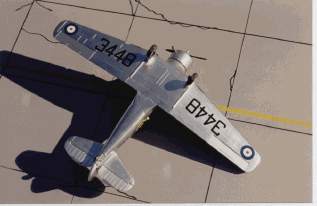
The control surfaces received a light dusting of Model Master Non-Polishing
Aluminum. I did this as an after thought, masking the fabric covered
surfaces with Post-It Notes. The wheels, propeller and a few other little
goodies were added and Smedley, that perennial Leading Air Craftsman, has
another aircraft to spend his time polishing.
|
 |
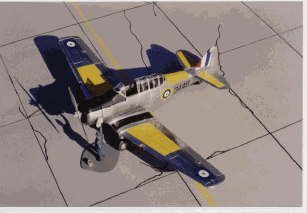 |
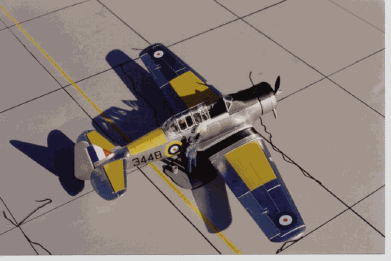
The yellow
recognition panels were then applied, not with paint but by using pieces of
Microscale Solid Decal sheet. I made masks by laying low tack masking tape
over the area and marking it to size for the panels. The wing walk is also
decal . The nose anti-glare panel is painted with flat Night Black and the
edges sharpened using thin decal strips. The rest of the decals are from
Belcher’s sheet supplied with the kit. |
| I want to
thank Mike Belcher for the chance to build another of his conversion kits.
The bits and pieces went together without trouble and it gave me another
unusual RCAF aircraft to add to my collection. |
 |