 |
 |
|
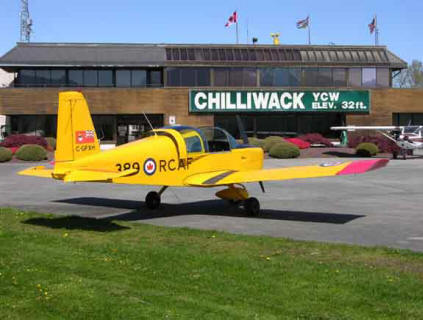
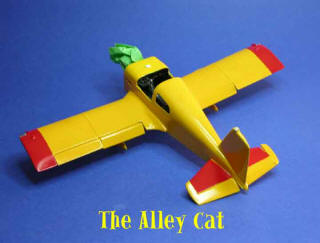
In June 1996, I bought myself a birthday present, a
1972 Grumman American AA1A and over the past few years, I have restored
the aircraft to its present condition and then decided that I needed a
model of my little yellow bird. Bragging rights you know! |
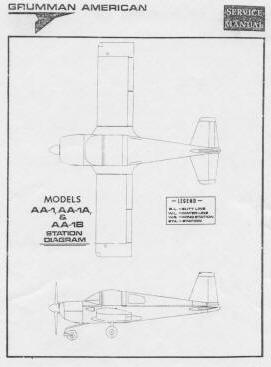 |
I scanned the top and side view of the aircraft
from my maintenance manual and confirmed the measurements against the
1:1 scale bird. This was then imported into Coreldraw and then scaled
to 1:32 using this program. These views were then printed out and used
to make parts templates which were then transferred onto .040” Evergreen
sheet styrene for the majority of the model.
|
 |
 |
|
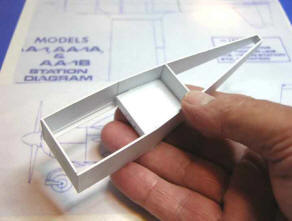
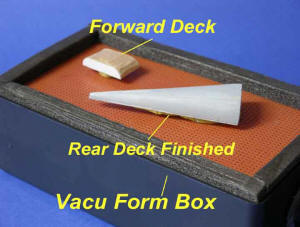
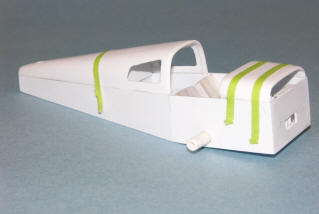
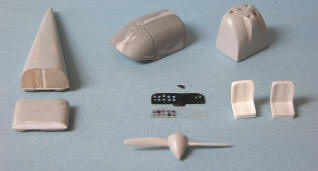
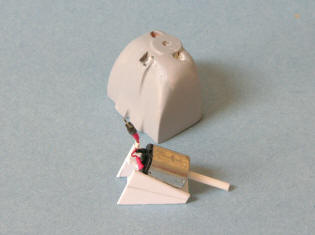
The fuselage is a basic box shown above with the
baggage compartment floor installed. I carved the top decks from balsa
and then vacuformed them from .040” sheet plastic. As in any new
scratch-build project, these parts were built more then twice until they
were what I wanted.
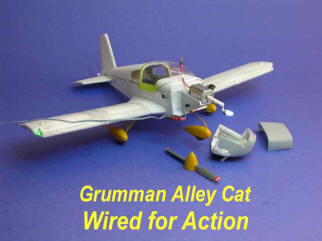
While thinking about this project, I decided to go
all the way and contacted Clyde Sasaki at Dynamic Scale Models, an
electronics firm in Portland, OR. I wanted a model with full lighting;
Navigation lights, anti-collision lights, pulse-lite on the nose,
lighted instruments and of course an electric motor to spin the
prop…with sound. |
 |
 |
|
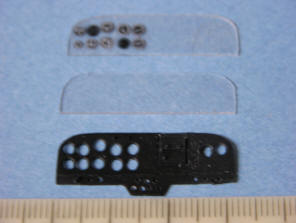
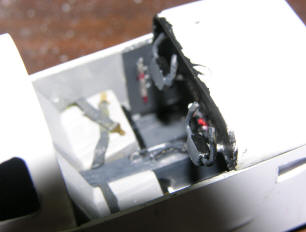
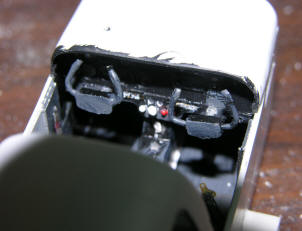
When the electronics package arrived, I made up the
instrument panel from three layers of .020” plastic with instrument
decals from Mike Grant. The back side of the rear piece was painted
flat white to diffuse the illumination from the miniature LEDs. The
panel has every control, switch, instrument and circuit breaker just
like the big toy. |
 |
 |
|
I test fitted the vacuformed top sections and when
satisfied, cut out the rear windows then I went to work to make up the
tail section. This was formed from layered pieces of .040” plastic and
when the airfoil shape was achieved, after a lot of filing and sanding,
I cut off the control surfaces. The vertical stabilizer was made with a
narrow channel up through the centre necessary for the LED
anti-collision light. |
 |
 |
|
I dug into the spares box for a spinner and prop
and seats and surprisingly enough these came from a partial Pitts S2B
kit that I had on hand…and they fit! I did have to reshape and shorten
the prop blades but this was a minor operation.
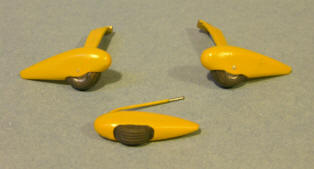
The landing gear came from the same source, the
destroyed Pitts S2S Bulldog. Very little modification was required
here. |
 |
 |
|
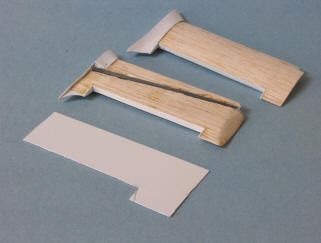
The wings were a composite of carved balsa core and
.015” sheet plastic with a plastic tube inserted into the bottom of the
wing for the LED nav lights. The 1:1 scale aircraft has a tubular spar
and this was incorporated into the model. This made the wing assembly
much easier later on. The wing root fairing is a build up of sheet
plastic which was finished after numerous attempts to get it right.
The ailerons and flaps were constructed from
plastic sheet and tube as per the original. |
 |
 |
|
Using the electric motor supplied by
Dynamicscalemodels.com and the side view of the fuselage I determined
the location of the motor mount and then formed it from .040” plastic.
It was then time to carve a mold from balsa for the cowling. The full
size cowling is made up from three pieces, top, bottom and nose bowl.
The balsa mold was carved in one piece then carefully cut apart along
the full size panel lines. After about five tries, I had a good cowling
vacformed from .040” plastic. The nose bowl and bottom piece were glued
together and the cowling top was made removable by making up a
tongue-and-groove as per the original, along the panel line.
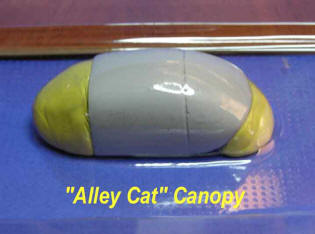
I also carved a balsa mold for the canopy but this
was a very frustrating exercise as I made more than 10 copies before
getting a good one. I tried a number of types of plastic but finally
settled on .030” PETG obtained from a local plastics shop. I have
enough of this product to make hundreds of canopies! |
 |
 |
|
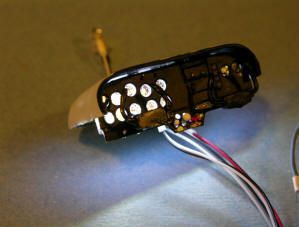
The centre console between the seats would hide the
power wires to the cowling and the LED navigation lights and this plus
the seats were installed after the interior was painted and the IC chip
was installed in the baggage area behind the seats and the wires were
routed to the proper locations. I installed the instrument panel, glare
shield and fuselage top followed by the vertical tail, horizontal tail
and tail cone which housed the fibre optic navigation light. |
 |
|
|
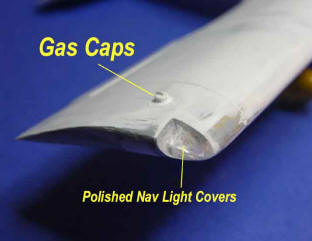
The navigation light covers on the full size
aircraft were vacformed but the small size of the model required
something different. I rough cut pieces of Plexiglas for the lens
covers then shaped them with a sanding drum in my Dremel tool. They
were filed, sanded and polished, the latter using Novus #3 Plastic
Polish and a cotton polishing disk in the Dremel. When they were
finished I set them aside until final assembly. |
 |
 |
|
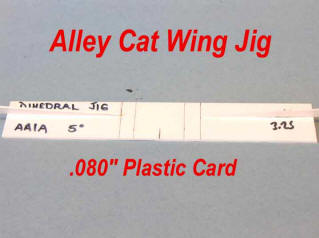
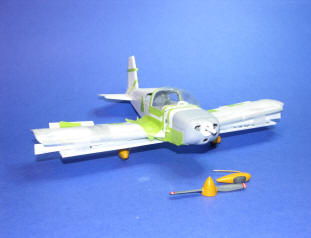
I made a wing jig from .080” plastic to ensure the
correct dihedral then assembled the wings and fuselage with plenty of
tape. The model was then taped to the jig and glued together. During
the assembly, I could have used another set of hands to hold the model
while I fished the LEDs through the wings.
The landing gear was installed along with cowling,
fuel caps, stall strips on the leading edges of the wings as well as the
navigation light covers on the wing tips. |
 |
 |
|
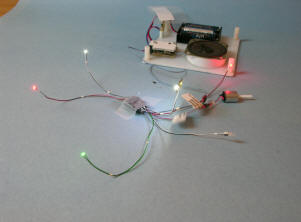
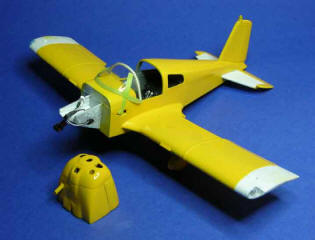
The model was then given one last test of the
electrics before going to the paint shop. With everything working
perfectly, I primed the model with Mr Surfacer 500 and sanded back down
to bare plastic while looking for defects. When satisfied, I shot the
yellow using Model Master Chrome Yellow enamel thinned with lacquer
thinners. |
 |
 |
|
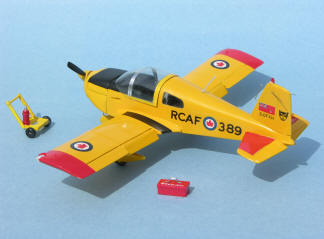
With the yellow now thoroughly dry, I masked it off
and applied the Model Master Guards Red enamel and the Flat Black
anti-glare panel on the cowling. The decals were supplied by the BIG
spares box and fortunately all were scaled correctly for the size of the
model. Because of the relatively small size of both the 1:1 scale
aircraft and the 1:32 scale model, it was important to get the decals in
proper proportions to fit each one and I used Patrick Martin’s book,
Royal Canadian Air Force Aircraft, Finish and Markings, 1945-1968 as my
prime reference.
The final bits; the VHF Com, VOR or and ELT
antennae along with the windshield, canopy and rear windows were then
installed. To find a pilot for the little beast, I dug up one from the
1:32 scale Matchbox Tiger Moth, chopped and channeled him, ground him up
with my Dremel tool and then when he fit into the seat, I painted the
figure, added a David Clarke headset with boom mike and set it aside to
work on the base. |
 |
 |
|
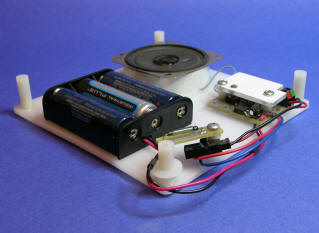
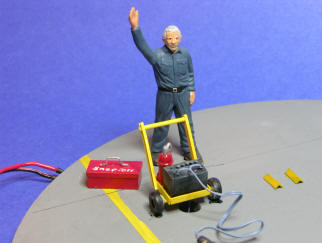
The power and sound module are under a base made
from 5mm Plexiglas. The power wires run up through a battery cart to
the auxiliary power plug on the right side of the cowling. The cart
with battery and fire extinguisher are all scratch-built and yes the
battery is to scale. The “Snap Off” tool box contains the rare earth
magnet which activates the system when it is placed by the mechanics
right foot. |
 |
 |
|
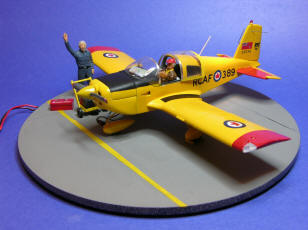
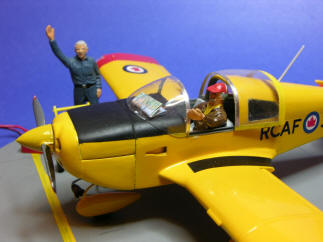
The mechanic figure came from the Matchbox Tiger
Moth kit and it was detailed to represent my good friend Werner
Griesbeck who made the 1:1 scale bird such an eye catching example of
his artistry with restorations. And finally a close up of the Dynamic
Duo on start up!
To watch a short
movie of the Alley Cat click here |
|
|
|
| |
|